No Bake Chocolate Biscuit Cake

No bake chocolate biscuit cake turns simple pantry biscuits, cocoa, butter, and milk into a rich fridge cake with almost no effort.
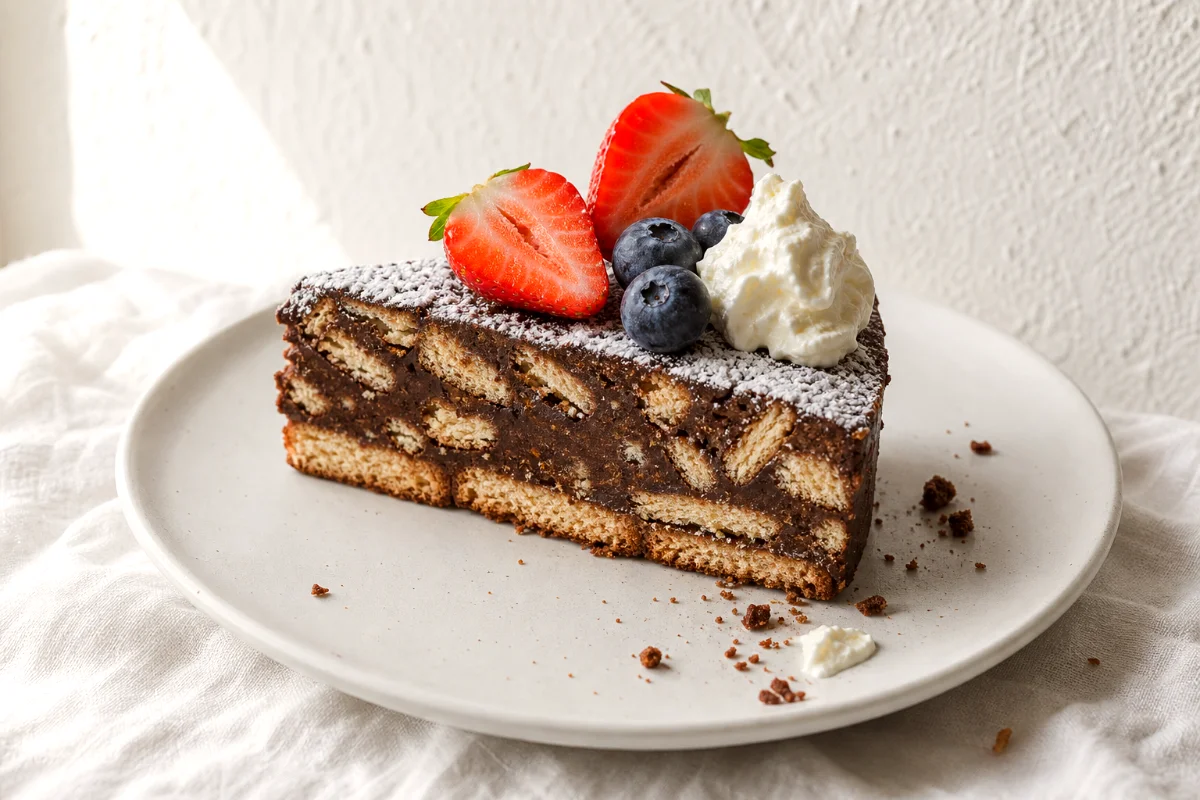
This is the kind of dessert I make when I want something homemade, chocolatey, and reliable without turning on the oven. The biscuits soften in the warm cocoa mixture, then firm up in the fridge into neat, sliceable pieces. Each bite tastes buttery, sweet, and deeply cocoa rich, with a gentle rum aroma in the background.
This recipe is an indulgent budget treat made from real, simple ingredients. It is perfect for small gatherings, weeknight dessert, or a make ahead sweet for the weekend.
Why You Will Love This Recipe
- No oven needed: The fridge does all the work after a quick stovetop chocolate mixture.
- Rich chocolate flavor: Unsweetened cocoa gives the cake a deep cocoa taste without expensive chocolate bars.
- Great texture: Crushed biscuits make the filling dense and fudgy, while whole biscuits help create a neat cake base.
- Make ahead friendly: It slices best after chilling, so you can prepare it several hours before serving.
Fabian’s Budget Tip: Use plain tea biscuits, digestive biscuits, or any simple store brand butter biscuits. Slightly broken biscuits work well here, so this recipe is a smart way to use up the crumbs at the bottom of the packet.
Ingredients (Serves 4)
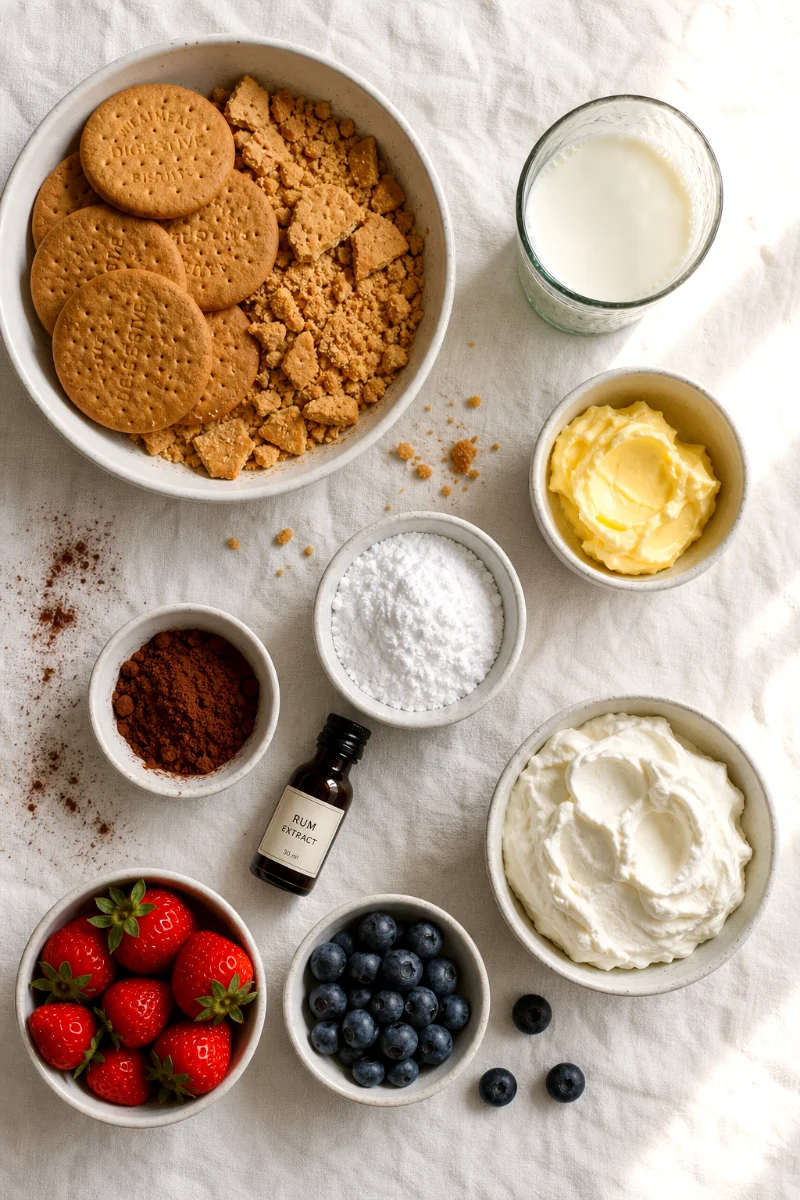
- 8 oz (220 g) plain tea biscuits or household biscuits, half finely broken and half kept whole
- 3 1/2 oz (100 g) unsalted butter
- 1/3 cup plus 1 tablespoon (80 g) powdered sugar
- 2 teaspoons (8 g) unsweetened cocoa powder
- 1/2 cup (120 ml) milk
- 1/2 teaspoon rum extract or rum essence
- Powdered sugar, for serving, optional
- Fresh strawberries, for serving, optional
- Fresh blueberries, for serving, optional
- Whipped cream, for serving, optional
Step-by-Step Instructions
1. Prepare the Biscuits
Break half of the biscuits into small pieces. Aim for a mix of crumbs and pea size bits, not a fine powder. Keep the other half whole so you can line the bottom of a small cake tin or loaf pan.
The different biscuit sizes matter. The small pieces soak up the chocolate mixture, while the larger whole biscuits give the cake structure and a classic layered bite.
2. Make the Chocolate Mixture
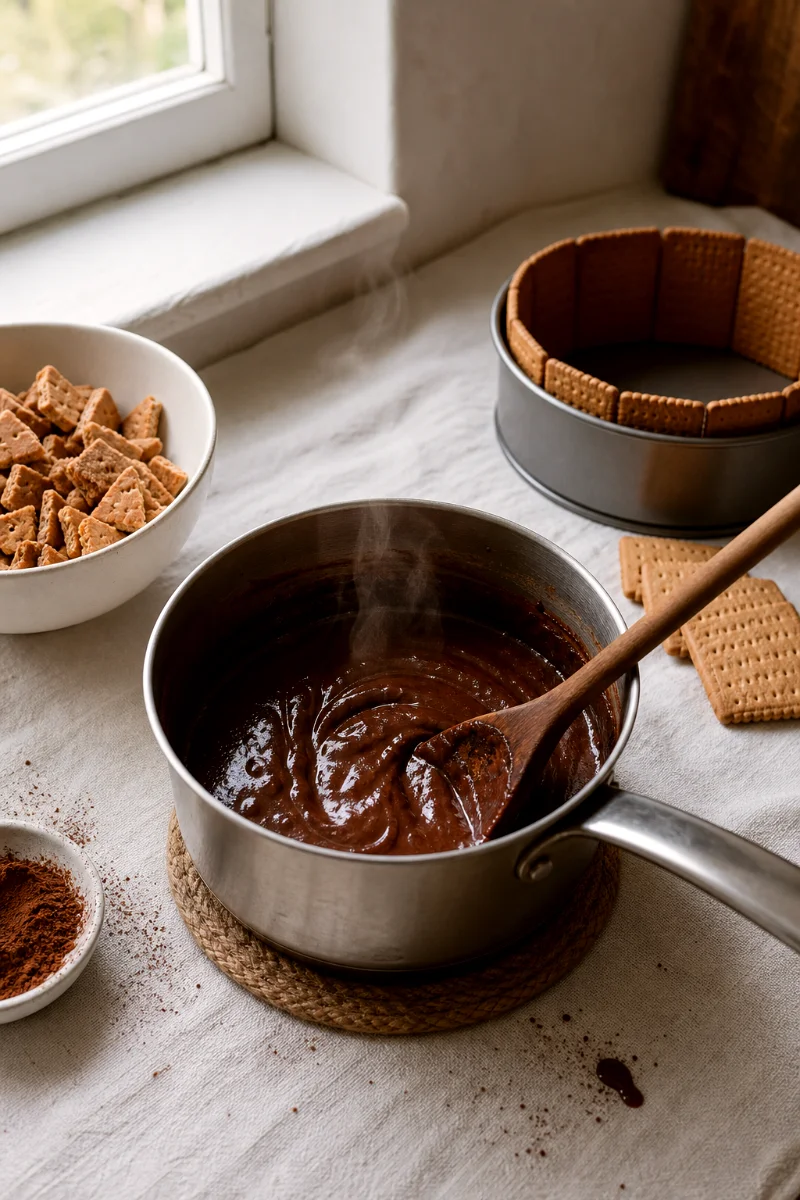
Add the butter to a small saucepan and melt it over low heat. When it turns glossy and golden, pour in the milk. Add the powdered sugar and cocoa powder.
Stir slowly until the cocoa disappears into the liquid and the mixture looks smooth, dark, and shiny. Keep the heat gentle. You want the mixture warm and silky, not boiling. When your kitchen smells like warm cocoa and butter, take the pan off the heat.
3. Add the Rum Aroma
Stir in the rum extract while the chocolate mixture is still warm. The heat helps the aroma bloom, so the cake tastes rounded and bakery style without using actual rum.
If the scent feels strong at first, do not worry. It softens after chilling and blends into the cocoa flavor.
4. Mix in the Broken Biscuits
Add the broken biscuits to the warm chocolate mixture. Stir until every crumb and piece is coated. The mixture should look thick, glossy, and spoonable, with biscuit pieces showing through the chocolate.
If it looks a little loose, let it sit for 3 to 5 minutes. The biscuits will drink in the cocoa mixture and thicken naturally.
5. Line and Fill the Pan
Line a small 6 inch (15 cm) cake tin or a small loaf pan with the whole biscuits. Spoon the chocolate biscuit mixture over the top.
Press it down gently with the back of a spoon so there are no large air pockets. Smooth the surface. A few uneven biscuit bumps on top are fine and make the cake look homemade.
6. Chill Until Firm
Let the cake cool at room temperature until it is no longer warm. Move it to the fridge and chill for at least 2 to 3 hours, or until firm to the touch.
For the cleanest slices, chill it overnight. The biscuits soften, the butter firms up, and the cake cuts into tidy pieces without crumbling.
7. Slice and Serve
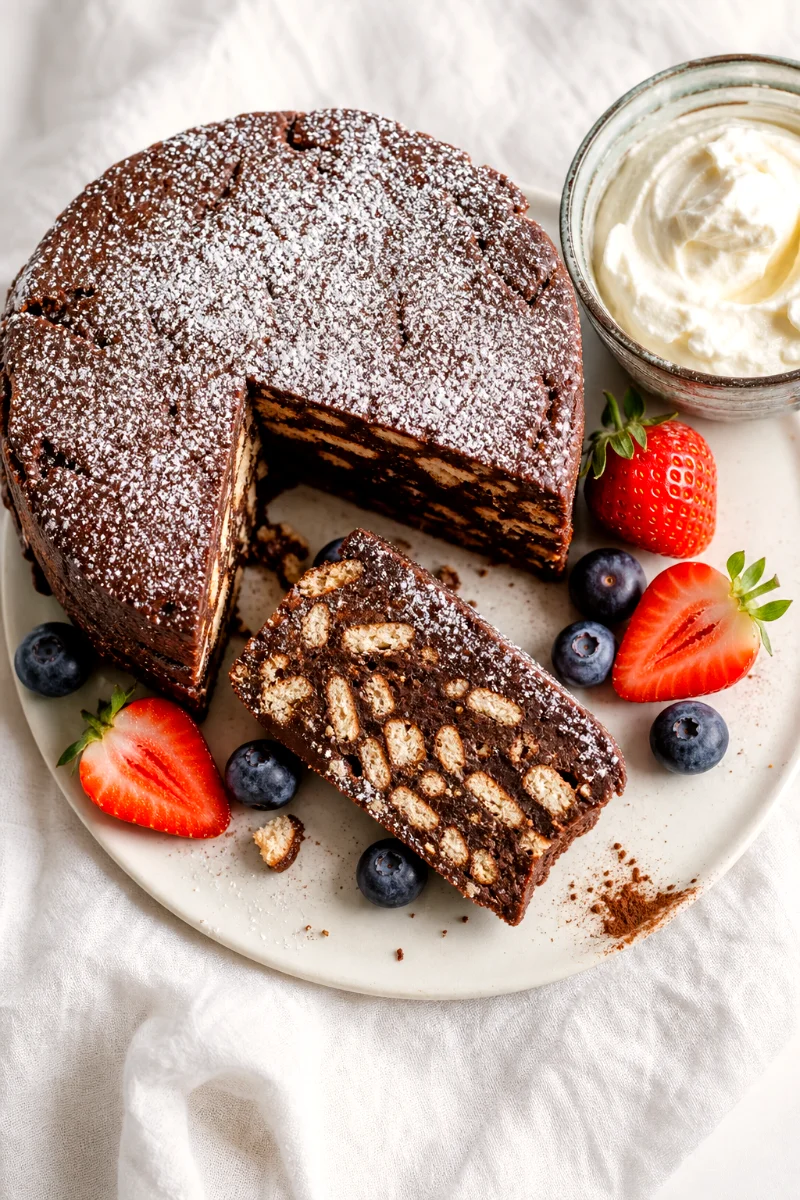
Use a sharp knife to cut the cake into 4 generous slices. Wipe the knife between cuts if you want clean edges.
Serve with a light dusting of powdered sugar, fresh strawberries, blueberries, and a spoonful of whipped cream. The berries add a bright, fresh contrast to the rich chocolate biscuit cake.
Expert Troubleshooting and FAQs
Why is my no-bake chocolate biscuit cake too soft?
It likely needs more chilling time, or the chocolate mixture was too warm when the cake went into the fridge. Chill it for another 1 to 2 hours. If your kitchen is warm, overnight chilling works best.
Why did my chocolate mixture turn grainy?
The heat may have been too high, or the cocoa and sugar did not dissolve fully. Use low heat and stir until the mixture looks glossy before adding the biscuits.
Can I make this without rum extract?
Yes. Leave it out, or replace it with 1/2 teaspoon vanilla extract. The cake will taste milder but still rich and chocolatey.
What biscuits work best?
Plain tea biscuits, household biscuits, digestive biscuits, or simple butter biscuits all work well. Avoid cream filled cookies because they can make the cake too sweet and greasy.
Can I freeze no bake chocolate biscuit cake?
Yes. Wrap the chilled cake well and freeze it for up to 1 month. Thaw it in the fridge before slicing. The texture may be slightly softer, but the flavor stays rich.
Estimated Nutritional Facts
These values are rough estimates per serving and will change based on the biscuits and toppings you use.
- Calories: about 430
- Protein: about 5 g
- Carbs: about 52 g
- Fats: about 23 g
No Bake Chocolate Biscuit Cake
Ingredients
- 8 oz (220 g) plain tea biscuits or household biscuits, half finely broken and half kept whole
- 3 1/2 oz (100 g) unsalted butter
- 1/3 cup plus 1 tablespoon (80 g) powdered sugar
- 2 teaspoons (8 g) unsweetened cocoa powder
- 1/2 cup (120 ml) milk
- 1/2 teaspoon rum extract or rum essence
- Powdered sugar, for serving, optional
- Fresh strawberries, for serving, optional
- Fresh blueberries, for serving, optional
- Whipped cream, for serving, optional
Instructions
- 1. Prepare the Biscuits. Break half of the biscuits into small pieces. Aim for a mix of crumbs and pea size bits, not a fine powder. Keep the other half whole so you can line the bottom of a small cake tin or loaf pan. The different biscuit sizes matter. The small pieces soak up the chocolate mixture, while the larger whole biscuits give the cake structure and a classic layered bite.
- 2. Make the Chocolate Mixture. Add the butter to a small saucepan and melt it over low heat. When it turns glossy and golden, pour in the milk. Add the powdered sugar and cocoa powder. Stir slowly until the cocoa disappears into the liquid and the mixture looks smooth, dark, and shiny. Keep the heat gentle. You want the mixture warm and silky, not boiling. When your kitchen smells like warm cocoa and butter, take the pan off the heat.
- 3. Add the Rum Aroma. Stir in the rum extract while the chocolate mixture is still warm. The heat helps the aroma bloom, so the cake tastes rounded and bakery style without using actual rum. If the scent feels strong at first, do not worry. It softens after chilling and blends into the cocoa flavor.
- 4. Mix in the Broken Biscuits. Add the broken biscuits to the warm chocolate mixture. Stir until every crumb and piece is coated. The mixture should look thick, glossy, and spoonable, with biscuit pieces showing through the chocolate. If it looks a little loose, let it sit for 3 to 5 minutes. The biscuits will drink in the cocoa mixture and thicken naturally.
- 5. Line and Fill the Pan. Line a small 6 inch (15 cm) cake tin or a small loaf pan with the whole biscuits. Spoon the chocolate biscuit mixture over the top. Press it down gently with the back of a spoon so there are no large air pockets. Smooth the surface. A few uneven biscuit bumps on top are fine and make the cake look homemade.
- 6. Chill Until Firm. Let the cake cool at room temperature until it is no longer warm. Move it to the fridge and chill for at least 2 to 3 hours, or until firm to the touch. For the cleanest slices, chill it overnight. The biscuits soften, the butter firms up, and the cake cuts into tidy pieces without crumbling.
- 7. Slice and Serve. Use a sharp knife to cut the cake into 4 generous slices. Wipe the knife between cuts if you want clean edges. Serve with a light dusting of powdered sugar, fresh strawberries, blueberries, and a spoonful of whipped cream. The berries add a bright, fresh contrast to the rich chocolate biscuit cake.